Prerequisites: This guide assumes you have an existing Suga project with a service that needs database access. If you need to create a project, see the Getting Started Guide.
Setup PostgreSQL with Docker
Create these files in your project root:docker-compose.yml
.env
Change the default password before using in any shared environment.
Start Database
Verify Database
Configure Database in Suga
Open the Suga dashboard:Open Suga Editor
DATABASE_URL.
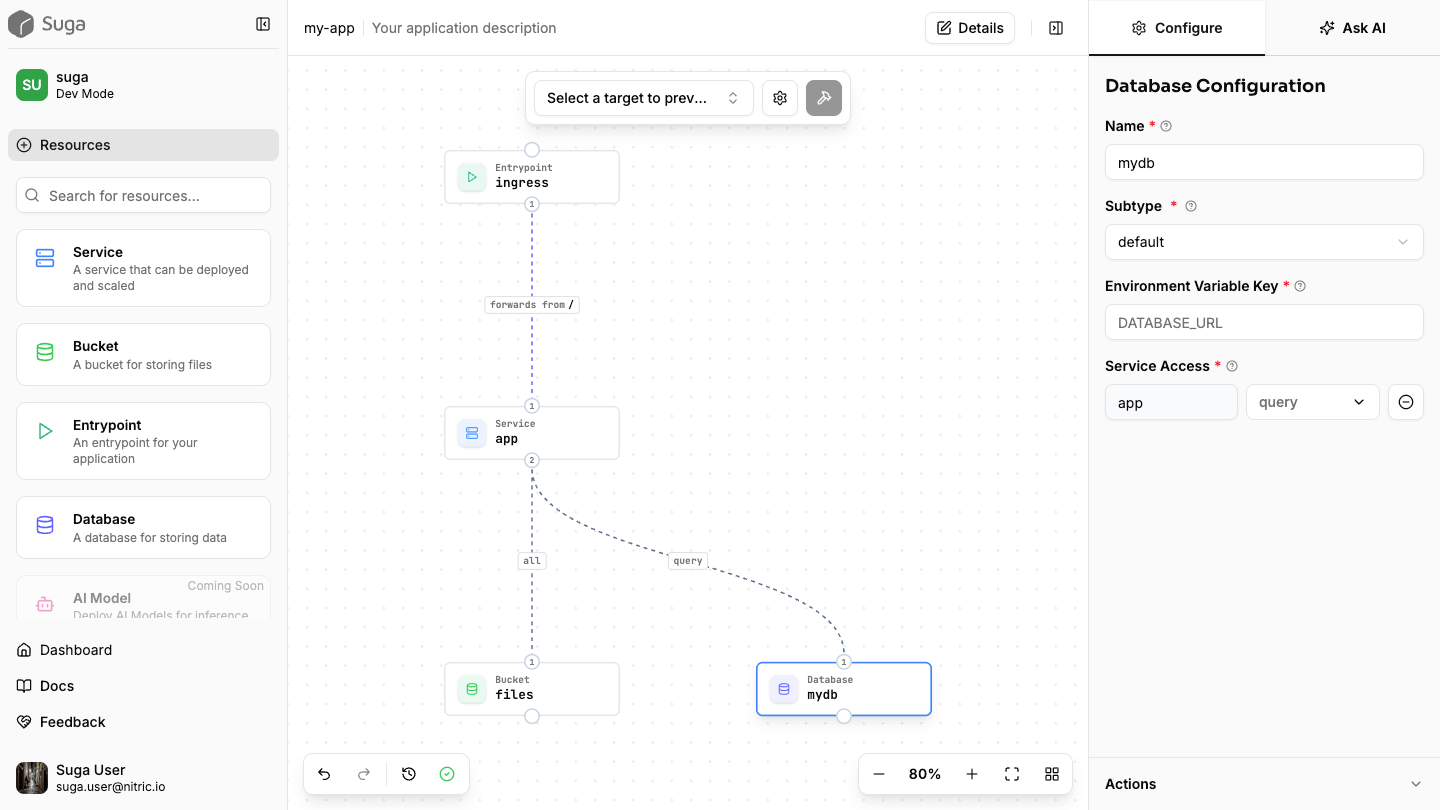
suga.yaml:
suga.yaml
For local development, you manually set
DATABASE_URL to point to your Docker database. When deployed, Suga automatically configures this same environment variable with your production database URL.Initialize Database Schema
You can set up your database schema however you prefer - using SQL files, ORM migrations, or database management tools. Below is one simple approach using a SQL file. Create aninit.sql file in your project root:
init.sql
Reset Database with Schema
For production, use a proper migration tool like golang-migrate, Flyway, or your ORM’s migration system.
Test Your Database Connection
Your application can now access the database using theDATABASE_URL environment variable that Suga provides. The connection string will be automatically injected when you run suga dev.
First, verify you can connect to the database directly:
Test Direct Connection
Start Your Application
DATABASE_URL environment variable and can connect to PostgreSQL. Create a simple endpoint or function in your application to test the database connection and verify everything works end-to-end.
Stop the database when finished:
docker compose downNext Steps
- For production, deploy your app and Suga will automatically configure the
DATABASE_URLwith your chosen PostgreSQL provider - Consider using proper migration tools or ORM migrations for schema management
- Review your database configuration and connection handling for production requirements